


What if those frustrating pockets of air aren't just an eyesore, but a signal that your $185 screen investment is at risk? You've likely felt the sting of a failed installation, watching a pristine display become marred by visual distortion. It's a common frustration for anyone learning how to get air bubbles out of screen protector setups. We understand that your devices are more than just tools; they're valuable assets that deserve a perfect, invisible shield.
This precision guide teaches you the technical methods to eliminate unsightly bubbles without risking a single scratch on your glass. You will gain the confidence to restore crystal-clear clarity to your iPhone, Tesla navigation display, or specialized marine electronics. We'll show you how to diagnose the difference between simple air pockets and trapped dust. You will learn the specific pressure techniques and extraction methods required for modern materials like self-healing hydrogel and 9H tempered glass. By the end of this article, you'll have the expert knowledge to maintain a flawless finish on every screen you own.
Key Takeaways
- Identify the root cause. Distinguish between mobile air pockets and static-trapped dust particles before applying corrective pressure.
- Material-specific recovery. Leverage the self-healing properties of hydrogel or the structural rigidity of tempered glass for optimal results.
- Master professional maneuvers. Learn exactly how to get air bubbles out of screen protector setups using the outward massage and precision lift-and-re-seat techniques.
- Proactive prevention. Deploy the "Steamy Bathroom" and "Hinge" methods to neutralize airborne contaminants and secure a factory-perfect, zero-dust finish.
Why Air Bubbles Appear on Your Screen Protector
Bubbles are the primary enemy of visual clarity. They compromise the integrity of your display and signal a failure in the bonding process. These imperfections stem from three main culprits: trapped air, microscopic dust particles, or residual surface oils. When you peel the protective backing from a new shield, you generate a significant static charge. This charge acts like a magnet for airborne debris. Even a single speck of dust prevents the adhesive from making full contact, creating a permanent void. Understanding how to get air bubbles out of screen protector installations starts with identifying these environmental and physical contaminants.
Screen curvature also plays a critical role. Many modern devices feature slight tapers at the glass edge. If a protector is even a fraction of a millimeter misaligned, the rigid material cannot conform to the curve. This creates the "halo effect," a stubborn ring of lifted adhesive that invites more dust and air over time. Humidity and airflow are equally vital. Dry, moving air increases static and carries more particles. Professional grade results require a controlled environment where these factors are neutralized before the adhesive touches the glass.
The Physics of Trapped Air
An air pocket is a non-adhered gap between film and substrate. These pockets form when the adhesive bond is interrupted by rapid application or improper pressure. In a dry install, air is pushed forward by the leading edge of the film. If the seal forms around a pocket before the air can escape, it becomes trapped. Different screen protector materials respond to this pressure in various ways. Wet installation methods use a specialized solution to keep the adhesive active, allowing air and fluid to be squeegeed out. However, if the solution evaporates too quickly or the technique is flawed, pockets remain.
Bubbles on Large Displays: Cars and Marine Gear
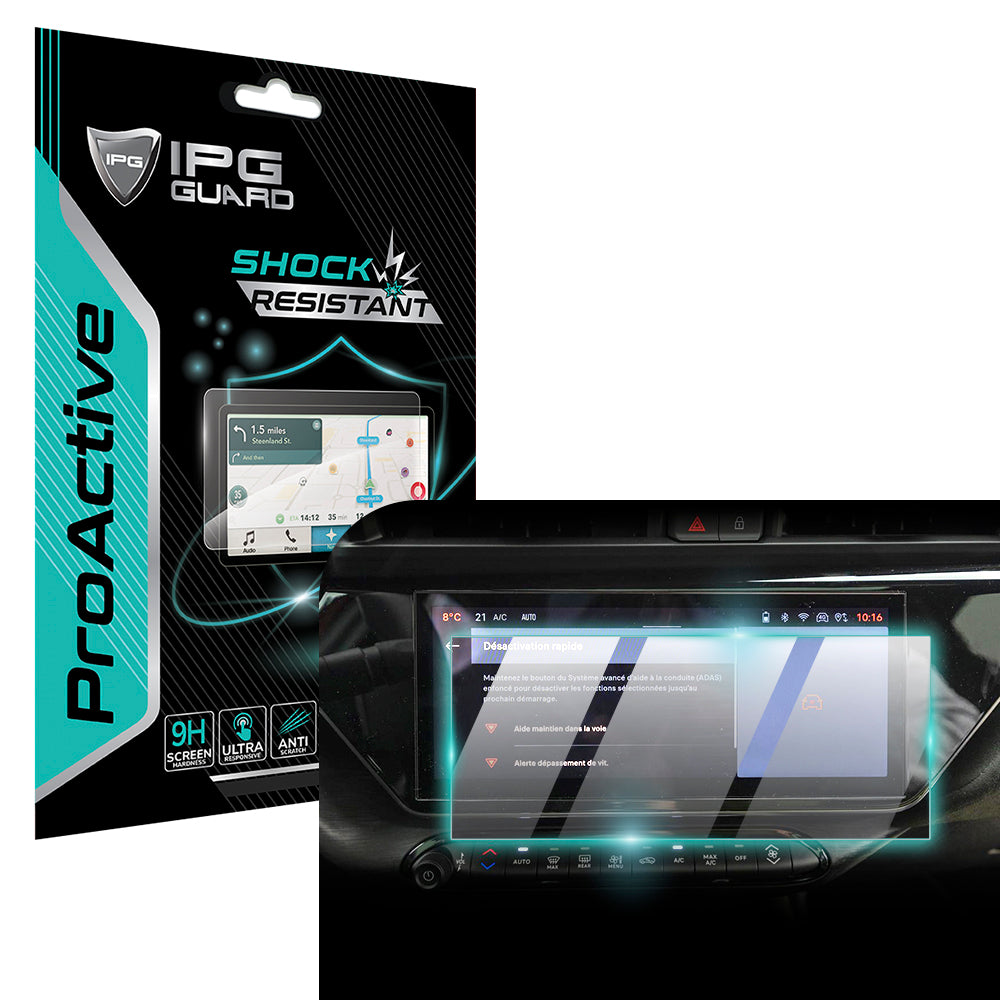
Protecting a 15.6-inch display, such as the one in a BYD Seal or a Tesla Model 3, presents unique technical challenges. The sheer surface area increases the statistical probability of dust intrusion. Large panels also generate more static during the unboxing phase. If you're using a specialized shield like the IPG ProActive for BYD 2022-2025 SEAL, alignment is critical to prevent edge lifting. Temperature fluctuations inside a vehicle also impact adhesion. Intense heat causes trapped air to expand, while cold can make some adhesives more brittle. These cycles can turn a tiny, unnoticeable bubble into a major distraction. For a deeper technical dive into specialized gear, consult The Definitive Guide to Screen Protection in 2026. Mastering how to get air bubbles out of screen protector setups on these high-value items ensures your navigation and safety tech stays crystal clear.
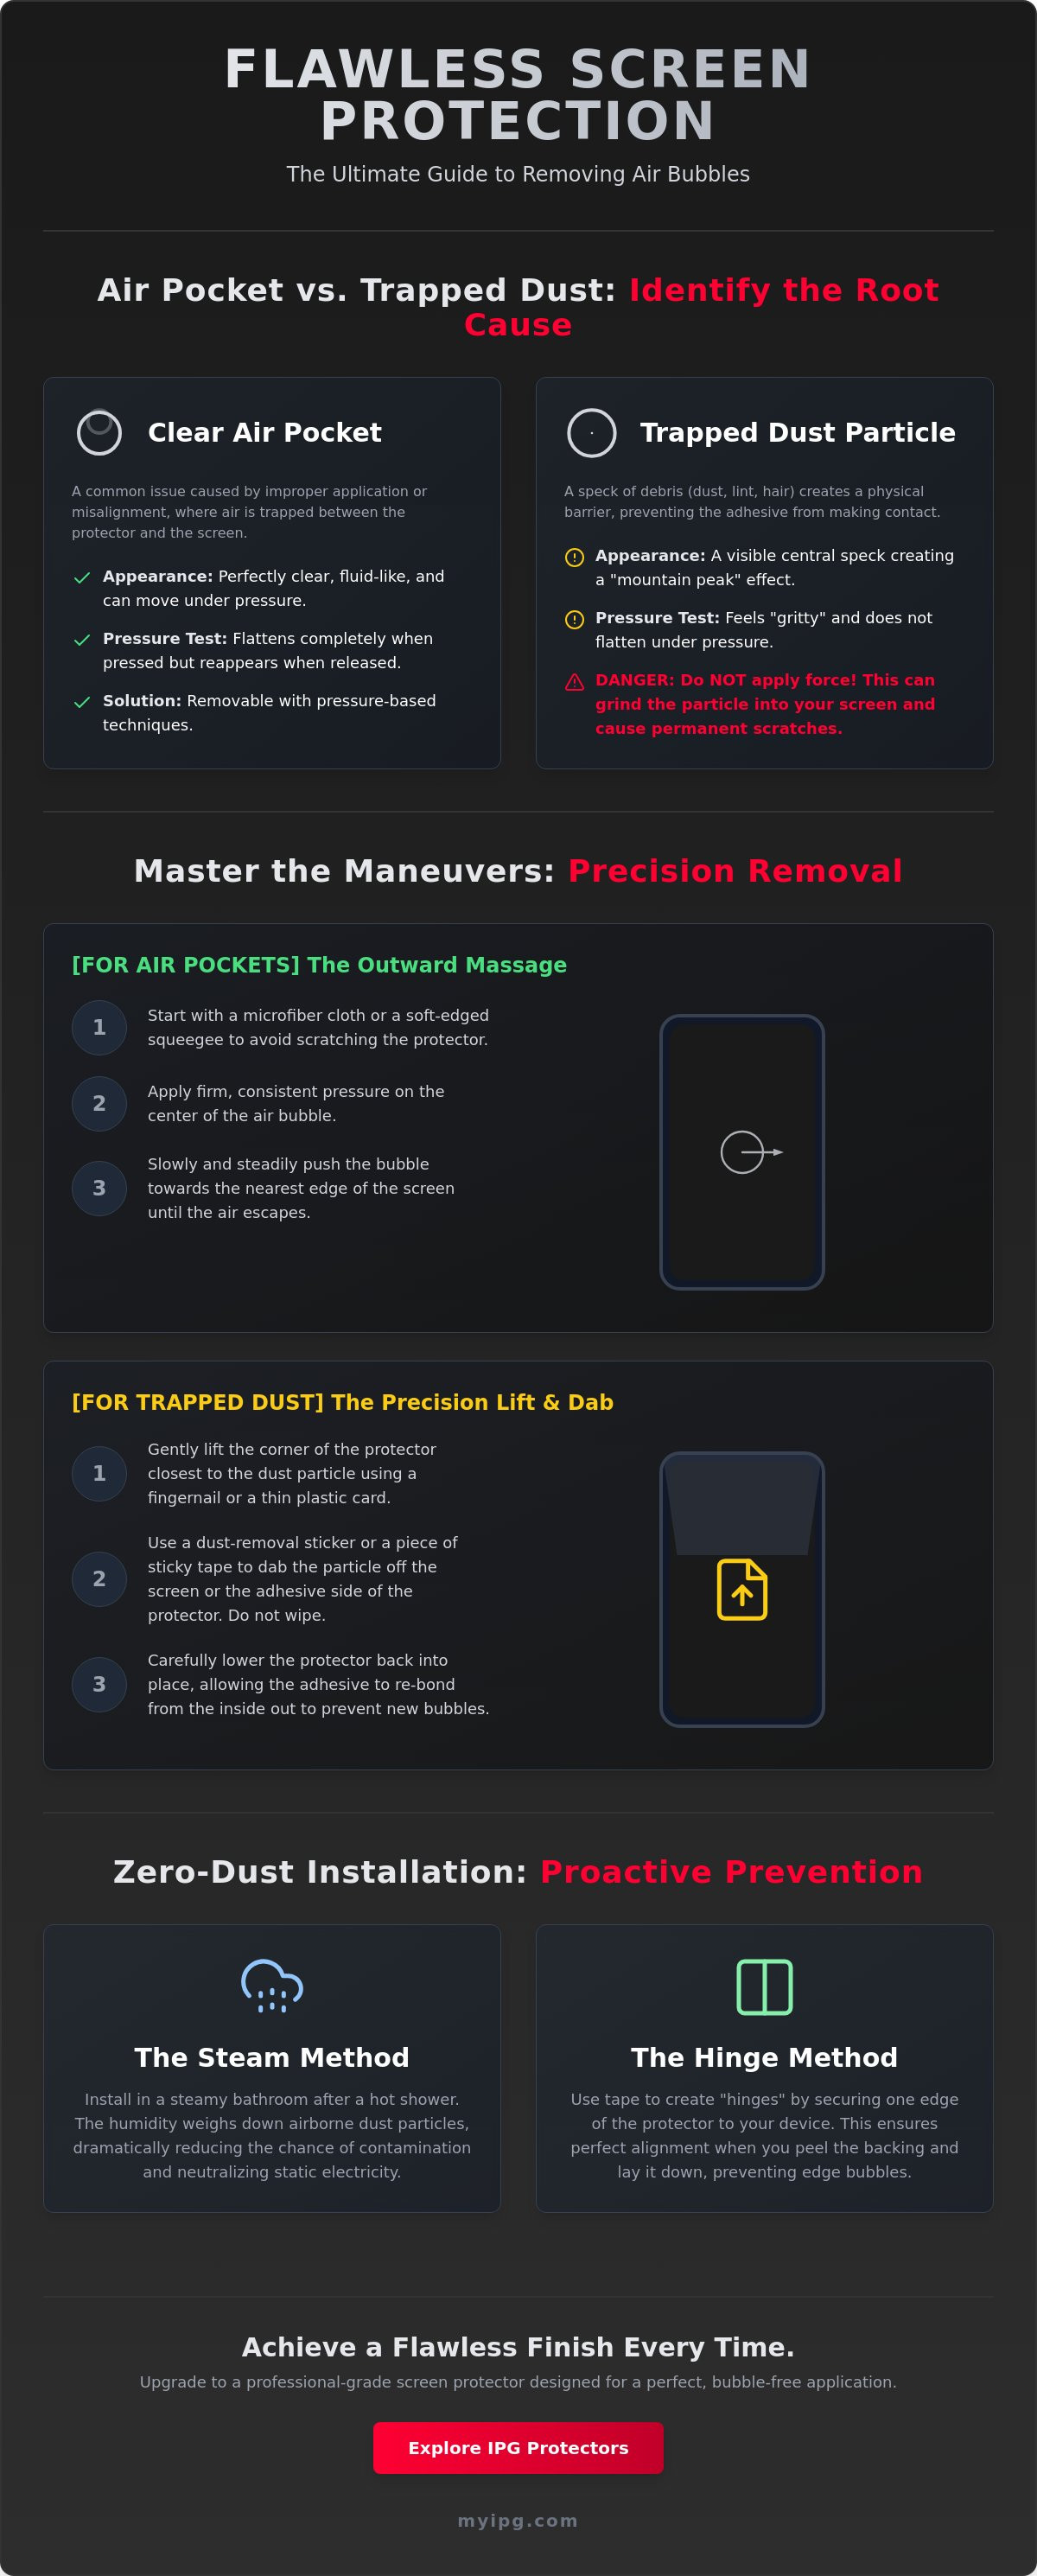
Air vs. Dust: Identifying the Root Cause
Before you attempt to fix your display, you must diagnose the obstruction. Misidentifying a particle as a simple pocket of air is a common mistake that leads to permanent screen damage. Air bubbles are clear, fluid, and often change shape under pressure. In contrast, dust bubbles contain a visible central speck. This microscopic debris acts as a physical barrier. If you apply excessive force to a dust bubble, you risk grinding that particle into your display. This can cause micro-scratches on high-value glass. Knowing how to get air bubbles out of screen protector installations requires this initial visual audit.
Perform the "Pressure Test" to confirm your findings. Use a microfiber cloth to apply gentle, steady pressure to the center of the bubble. If the bubble flattens completely but returns once pressure is released, you're dealing with air. If the bubble refuses to flatten or feels "gritty" under your finger, debris is present. For those using hydrogel films, don't confuse "Orange Peel" texture with air. This slight ripple is a material property that often settles within 24 hours. If you need a fresh start with advanced debris-repelling technology, consider an IPG Zerodust Screen Protector for your next application.
Diagnosing the Clear Air Pocket
Air pockets typically manifest near the edges or in large, irregular shapes. They are symptoms of poor initial contact or slight misalignment. Misalignment prevents the adhesive from seating correctly against the glass. Use a magnifying glass to inspect the perimeter of the pocket. If the space is perfectly clear, the vacuum has simply been broken. These are the easiest imperfections to resolve through mechanical massage.
The Tell-Tale Signs of Trapped Debris
Trapped debris creates a "mountain peak" effect. The protector is lifted away from the screen by a central point of interference. Common culprits include lint, skin cells, and micro-dust. These particles create a circular void that refuses to budge. Unlike air, these require extraction. Massaging a dust bubble is counterproductive. It only stresses the adhesive and can lead to permanent distortion. Understanding how to get air bubbles out of screen protector layers means knowing when to stop pushing and start lifting.
Material Matters: Hydrogel vs. Tempered Glass Methods
Your strategy for restoration depends entirely on the material of your shield. Flexible films and rigid glass require opposite approaches. Using a heavy-handed technique on a soft film can cause permanent stretching; applying too little pressure to glass leaves the vacuum unsealed. Mastering how to get air bubbles out of screen protector installations means respecting these material limits. Whether you're protecting a smartphone or a high-end diagnostic tool, the physics of the bond remains the priority. You must match your recovery method to the specific properties of the substrate to avoid wasting a high-value accessory.
The Hydrogel Advantage: Self-Healing Bubbles
The IPG Original (Hydrogel) Screen Protector is engineered with a specialized thermoplastic polyurethane layer. This material features self-healing properties that naturally dissipate microscopic air pockets. If you see tiny, clear bubbles immediately after installation, stop. Don't massage them. Follow the "No-Touch" rule for at least 24 hours. Most small imperfections will vanish as the material settles and the air permeates through the film. To accelerate this process, apply gentle heat from a hairdryer on the lowest setting for 15 seconds. This softens the hydrogel and helps it conform to the substrate, effectively pushing air out without manual intervention. It's a methodical approach that relies on the material's chemistry rather than brute force.
Tempered Glass: Precision Lifting Techniques
Unlike hydrogel, tempered glass is rigid and won't self-heal. If a bubble remains, it requires mechanical removal. Lifting the edge of a glass shield is a delicate operation. Never use your fingernail; your natural skin oils will contaminate the adhesive and prevent a secondary bond. Instead, use a thin plastic shim or a piece of stiff card to gently pry up the nearest corner. Lift only enough to reach the bubble. Once the air is released, use the "Drop and Press" method. Let the glass fall back into place naturally, then apply firm pressure from the center outward to secure the seal. This is the most effective way how to get air bubbles out of screen protector setups made of 9H glass.
Specialized gear requires even more precision. Automotive accents like a Tesla Model 3 / Model Y door handle decal or a Volkswagen Front Emblem Logo use specific vinyl-based adhesives. These are prone to "tenting" around curves. Similarly, industrial shields for tools like the Snap-on Triton Apollo Solus + screen protector or Autel MaxiSYS MS909 must be perfectly flat to maintain touch sensitivity. For these items, focus on slow, methodical application. If a bubble appears on these heavy-duty films, use a soft squeegee to drive the air toward the nearest exit point before the adhesive fully cures. Protecting these high-value tools requires a guardian's eye for detail and a steady hand.
The Precision Guide: 4 Methods to Get Air Bubbles Out
Precision is non-negotiable when restoring your display's integrity. Once you've identified the cause, you must apply the correct mechanical solution. These methods work across all platforms, from your daily smartphone to high-value marine electronics like the Lowrance Eagle 4" Elite. Don't rush the process. A methodical approach ensures you don't trade a bubble for a permanent scratch. Here is how to get air bubbles out of screen protector installations using four professional techniques.
- Method 1: The Outward Massage. This is the first line of defense for small air pockets near the perimeter. Use a microfiber cloth to apply firm, steady pressure. Push the air toward the nearest edge in a single, fluid motion.
- Method 2: The Lift and Re-seat. Use this for large pockets or slight misalignment. Gently lift the corner closest to the bubble with a plastic shim. Release the air and let the shield settle back naturally.
- Method 3: The Dust Extraction. This is the only technical fix for bubbles caused by debris. It requires a steady hand and a controlled environment.
- Method 4: The Micro-Heat Application. Advanced technique for stubborn "halo" effects on curved glass or car displays. Use a hairdryer on low to soften the adhesive before applying pressure.
Method 3: Professional Dust Extraction
If a visual audit reveals a central speck, you must extract it. Massaging a dust bubble will only damage the adhesive. Follow these steps for a surgical fix:
- Step 1: Lift the protector corner nearest to the dust speck using a pull-tab or thin plastic shim. Do not touch the adhesive with your fingers.
- Step 2: Use a "Dust Removal Sticker" or a piece of clear Scotch tape. Gently dab the adhesive side of the protector to grab the speck.
- Step 3: Lower the protector slowly. Apply pressure from the center outward to ensure a vacuum seal.
For a complete breakdown of the initial application process, read our guide on How to Put a Screen Guard on Like a Pro.
Using the Right Tools: Microfiber and Squeegees
The tools you choose dictate the quality of the repair. A dedicated squeegee is far superior to a credit card, especially for IPG ProActive films. Credit cards often have sharp edges that can gouge hydrogel or scratch the oleophobic coating on tempered glass. Always use a lint-free microfiber cloth to buffer your tools. This prevents new static from attracting more debris while you work. Never use paper towels. They shed microscopic wood fibers that create more bubbles than they solve. If you need professional-grade tools for your next project, explore our IPG Zerodust Screen Protector kits for a seamless experience. Mastering how to get air bubbles out of screen protector setups is easier when you have the right gear in your hands.
Zero-Dust Installation: How to Prevent Future Bubbles
Prevention is the ultimate act of stewardship for your high-value devices. Why spend time learning how to get air bubbles out of screen protector installations when you can eliminate the cause at the source? Most application failures happen because of microscopic airborne contaminants. Control your environment first. Use the "Steamy Bathroom" technique to ground floating debris. Run a hot shower for five minutes until the room is humid. This moisture acts as a natural anchor for dust, pulling particles out of the air and away from your screen. It creates a temporary clean-room environment for a professional-grade finish.
Alignment is the second pillar of a bubble-free result. Use the Hinge Method to secure your trajectory. Place the protector on the screen with the backing still attached. Align it perfectly. Apply two strips of tape to one side, connecting the protector to the device body like a book cover. Flip the protector open, remove the adhesive backing, and flip it back down in one fluid motion. This ensures the adhesive meets the glass exactly where you aligned it, preventing the edge lifting that often requires you to research how to get air bubbles out of screen protector fixes later.
IPG Zerodust technology represents the next generation of application security. It features an integrated anti-static treatment that neutralizes the charge generated when peeling the protective film. This prevents the shield from acting as a magnet for dust during the critical seconds of exposure. Perform a final inspection using a bright sidelight. Hold a flashlight at a low angle across the display. This reveals micro-dust that is invisible under direct overhead lighting, allowing you to clear the path before the bond is sealed.
The Professional Setup
Create a draft-free workspace. Turn off all fans, heaters, and air conditioning units to stop air circulation. Follow the "Double-Clean" process. Use an alcohol wipe to dissolve surface oils, followed by a lint-free microfiber cloth. Finish with a dust-removal sticker to grab any remaining fibers. Never touch the adhesive side of the protector. Even a clean fingertip leaves skin oils that create permanent, non-removable voids in the adhesive layer.
Choosing the Right Shield for Easy Install
Material choice dictates your margin for error. IPG Original (Hydrogel) is significantly more forgiving for beginners than rigid tempered glass. Its flexible structure allows the material to settle and conform, often absorbing minor application errors. For specialized equipment like the Harley Cluster Display protector, always choose custom-fit designs. These precision-cut shields match every contour of the gear, eliminating the gaps that invite air intrusion. High-end protection requires a high-end start.
Upgrade to an IPG Zerodust Protector for a flawless, bubble-free finish.
Achieve a Flawless, Protected Display
Restoring your screen’s clarity is a matter of technical precision. You now have the diagnostic tools. Distinguish between simple air pockets and obstructive dust. You understand why hydrogel requires patience while tempered glass demands a surgical lift. Mastering how to get air bubbles out of screen protector setups ensures your high-value technology remains in pristine condition. No more visual distortion. No more failed applications. Whether you are maintaining a flagship smartphone or a specialized marine fishfinder, these professional methods preserve the integrity of your gear.
Don't settle for a compromised view. Our aerospace-grade materials are engineered for durability and visual perfection. We provide custom-fit solutions for 10,000+ devices. It's why we're trusted by Tesla and Garmin owners worldwide. Take the next step in device stewardship today. Secure your display with the best in the industry.
Browse IPG Zerodust Protectors for a Flawless Finish
Your equipment deserves a guardian’s care. Apply your new skills with confidence and enjoy a perfectly smooth, invisible shield.
Frequently Asked Questions
Can I use vegetable oil to remove bubbles from the edges of my screen protector?
No, you should never use vegetable oil or other household liquids to seal the edges of a protector. These substances degrade the adhesive layer over time and can seep into your device's internal components, leading to permanent hardware failure. Stick to professional installation solutions or steady, mechanical pressure to secure the perimeter of your shield.
Will small air bubbles eventually go away on their own?
Small air bubbles often vanish on their own within 24 to 48 hours if you're using a hydrogel film. This material is breathable, allowing microscopic air pockets to permeate through the substrate as the adhesive settles. However, bubbles in rigid tempered glass are trapped by a vacuum seal and usually require manual intervention or a precision lift to resolve.
How many times can I peel off and reapply a screen protector?
You can typically reapply a screen protector once or twice if the silicone adhesive remains clean and free of debris. Every time you lift the shield, you expose the sticky surface to airborne contaminants and static electricity. This significantly increases the difficulty of how to get air bubbles out of screen protector layers during your second attempt.
What is the best tool to push air bubbles out without scratching the film?
A dedicated rubber-tipped squeegee is the superior tool for eliminating air pockets without damaging the surface. If you don't have one, wrap a plastic card in a clean, lint-free microfiber cloth. This buffering layer prevents the rigid edge of the card from gouging the film or scratching the delicate oleophobic coating on your display.
Why do bubbles keep appearing on the edges of my curved screen?
Edge bubbling on curved displays usually stems from microscopic misalignment during the initial application. If the protector is even 0.5mm off-center, the edge of the film hits the taper of the glass instead of the flat surface. This prevents a flush bond and creates a permanent air channel that refuses to stay sealed despite constant pressure.
Is it possible to remove dust from a screen protector after it has been applied?
Yes, you can remove trapped dust by using a pull-tab to lift the corner nearest to the speck. Once the adhesive is exposed, use a piece of clear Scotch tape or a dust-removal sticker to dab the particle away. This is the most technical part of learning how to get air bubbles out of screen protector installations that have been compromised by debris.
Does a hairdryer really help in getting rid of bubbles?
A hairdryer set to low heat is highly effective for softening hydrogel materials and making them more pliable. The warmth helps the film conform to the substrate and can accelerate the self-healing process for stubborn air pockets. You must never use high heat, as it can warp the protector or damage the liquid crystal display of your device.
Can a cracked screen cause bubbles under a new protector?
A cracked screen will almost always cause bubbles to form under a new protector. The fissures in the glass create uneven surfaces and air channels that prevent the adhesive from forming a continuous vacuum seal. In these cases, the protector acts as a safety layer to prevent further cracking rather than providing a perfectly clear, bubble-free finish.