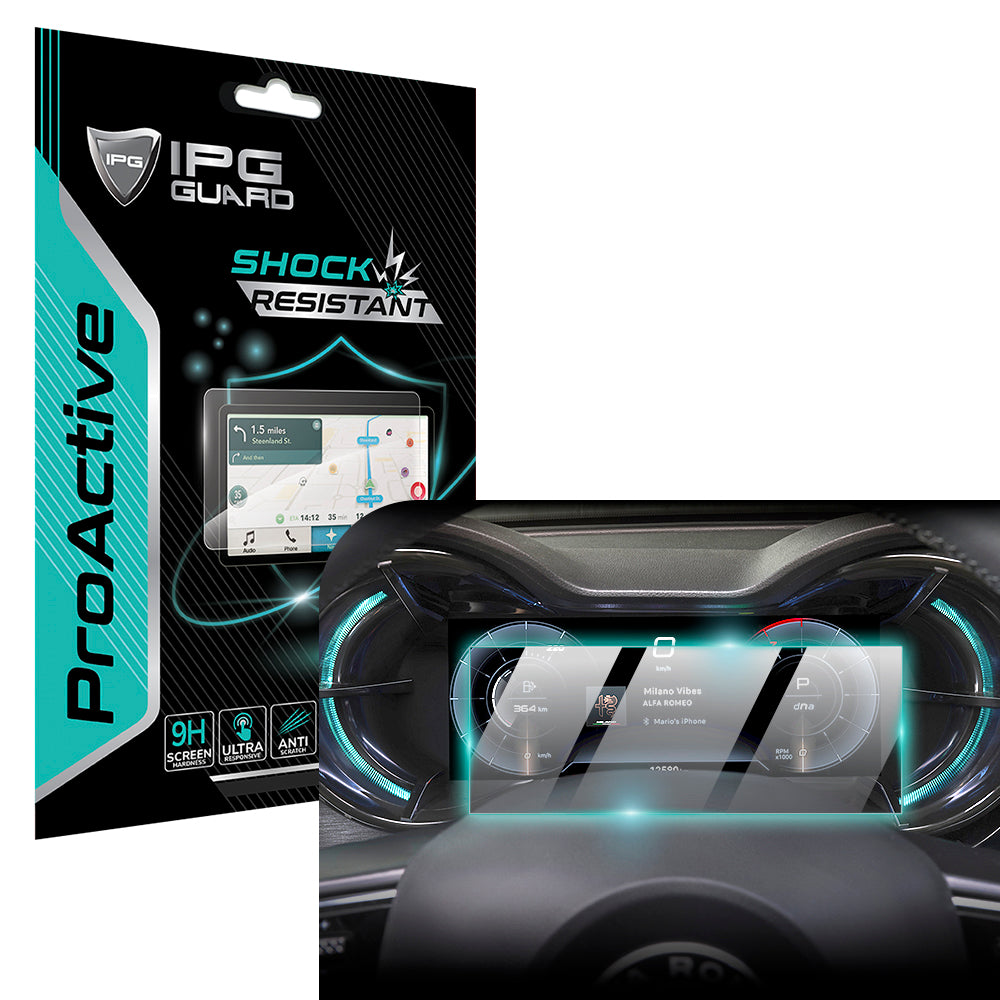



A tempered-glass screen protector paired with a raised-edge case is a practical first defense against scratches. A practical way of avoiding the frustration of a scratched screen is to shield the display from everyday contact, while understanding that a protector may make light marks less noticeable but won’t repair damaged glass.
It’s frustrating to spot a scratch on a device you rely on and handle every day. The right protection can help preserve the screen, but its effectiveness depends on more than the material alone.
This guide explains how tempered glass and raised edges help, how scratch depth affects what you can do, and why adhesive thickness matters when a protector sits over a light mark. You’ll also learn when a scratch is more than a surface blemish and how to protect the display without relying on risky polishing tricks.
Key Takeaways
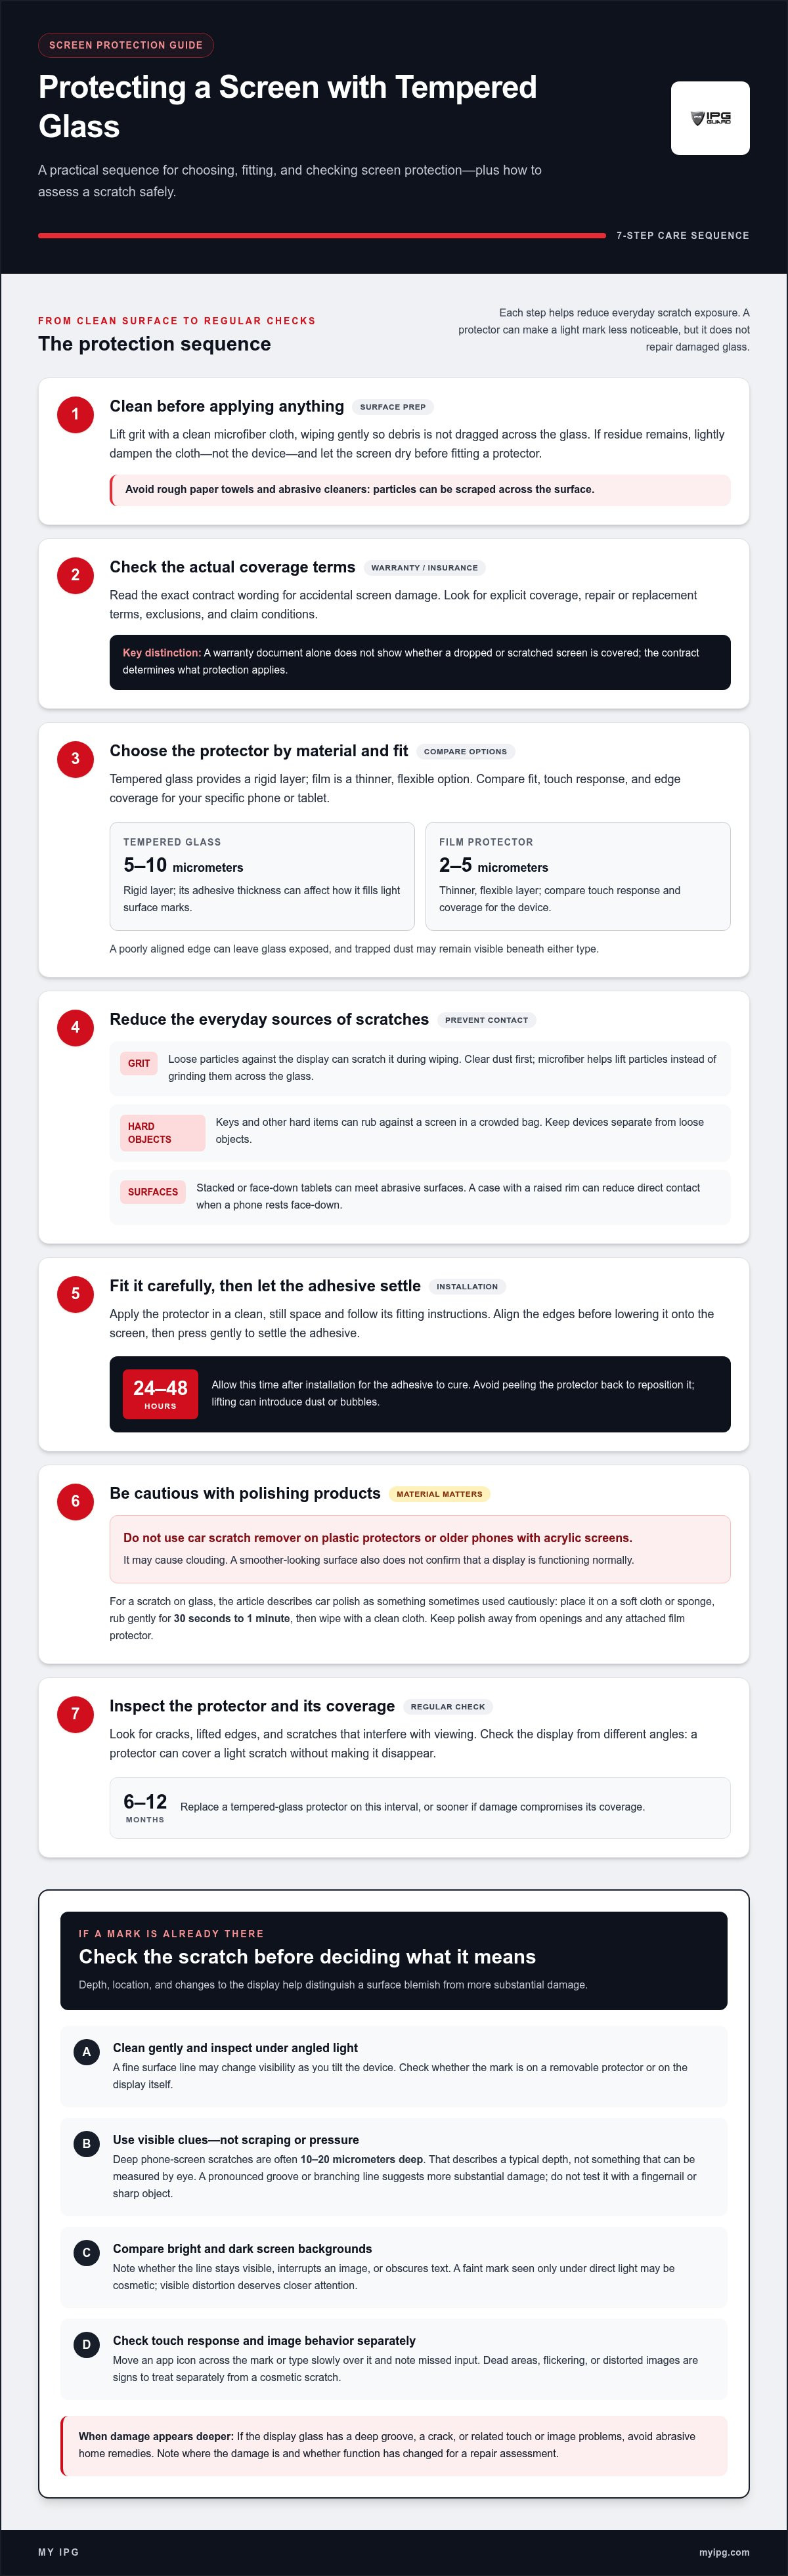
- Pair a compatible tempered-glass protector with a raised-edge case to help shield the display from everyday contact.
- Assess whether a mark is a surface scratch or a deeper groove before choosing how to protect the screen.
- Understand how adhesive thickness can affect the appearance of light scratches beneath a screen protector.
- Keep abrasive objects and loose debris away from your device to reduce common scratch risks.
- Watch for changes in touch response or display clarity, which can signal damage beyond a cosmetic mark.
Protecting screens with tempered glass
Pair a compatible screen protector with careful handling to reduce everyday scratch exposure. Choose based on material, fit, and the kind of marks you want to guard against.
- Clean the screen before applying anything. First, remove grit with a clean microfiber cloth, then wipe gently without dragging debris across the glass. If residue remains, lightly dampen the cloth, not the device. Avoid rough paper towels and abrasive cleaners, which can scrape particles over the surface. Let the screen dry before placing a protector.
- Read the exact warranty or insurance terms for accidental screen damage. Look for explicit coverage of accidental damage, repair or replacement, exclusions, and claim conditions. A warranty document alone doesn’t show whether a dropped or scratched screen is covered; the contract’s wording determines what protection applies.
-
Compare Tempered Glass and Film Protectors
Choose tempered glass when you want a rigid layer over the display; choose film when a thinner, flexible layer better suits your device. Compare fit, touch response, and edge coverage before buying. Tempered-glass adhesive layers are around 5-10 micrometers thick, compared with 2-5 micrometers for film protectors. That difference can affect how adhesive fills light surface marks.
Check that the protector matches your specific phone or tablet screen. A poorly aligned edge can leave glass exposed, while trapped dust can remain visible beneath either material.
-
Identify Common Screen Scratch Causes
Before choosing a protector, consider where and how marks appear. Loose grit trapped against a display can scratch it during wiping; keys or other hard objects can rub against a screen in a crowded bag. Tablet screens can also meet abrasive surfaces when devices are stacked or placed face-down.
Keep devices separate from loose objects, and clear dust from the display before cleaning. A microfiber cloth helps lift particles instead of grinding them across the glass. Check the case opening, too: a raised rim can reduce direct contact when a phone rests face-down.
- Apply the protector in a clean, still space, following its fitting instructions. Align its edges before lowering it onto the screen, then press gently to settle the adhesive. Allow 24-48 hours after installation for the adhesive to cure. During that period, avoid peeling the protector back to reposition it, since lifting can introduce dust or bubbles.
- Don’t use car scratch remover on plastic protectors or older phones with acrylic screens; it may cause clouding. For a scratch on glass, car polish is sometimes used cautiously: put it on a soft cloth or sponge, rub gently for 30 seconds to 1 minute, then wipe with a clean cloth. Avoid letting polish reach openings or an attached film protector.
- Inspect the protector regularly for cracks, lifted edges, and scratches that interfere with viewing. Replace a tempered-glass protector every 6-12 months, or sooner if damage compromises its coverage. A protector can cover a light scratch without making it disappear, so check the display from different angles before deciding whether the mark remains visible.
Differences between deep and surface scratches
Inspect the mark before choosing what to do. Its depth, location, and effect on the display help distinguish a surface blemish from deeper damage.
- Clean the screen gently, then inspect the mark under bright, angled light. A surface scratch may appear as a fine line that changes visibility as you tilt the phone. Check whether the mark is on a screen protector or the display itself. A mark on a removable protector doesn’t mean the glass underneath is scratched.
- Look closely without scraping or pressing the mark. Surface scratches tend to appear shallow and primarily affect the outer finish. Deep phone-screen scratches are often 10-20 micrometers deep. That figure describes a typical depth, not a measurement you can determine by eye, so use visible damage and screen behavior as practical clues.
- Check whether the line catches light consistently from different angles. A faint mark that appears only under direct light may be a surface blemish; a pronounced groove or branching line suggests more substantial damage. Don’t run a fingernail or sharp object across it. That test can apply pressure without reliably showing how deep the scratch is.
- Compare the mark against different screen backgrounds. Open a plain, bright screen, then view the same area against a dark background. Note whether the line stays visible, interrupts an image, or obscures text. A scratch that changes appearance across backgrounds may be cosmetic, while visible distortion deserves closer attention before you use the device as usual.
- Check touch response around the affected area. Move an app icon across the mark, or type slowly over it, and note any missed input. A scratch alone doesn’t prove the touchscreen has failed. If the display also shows dead areas, flickering, or distorted images, treat those signs separately from a cosmetic surface mark.
- Choose your next step based on what you find. If a mark is on a protector, inspect its edges and viewing clarity before replacing it. If the display glass has a deep groove, a crack, or related touch or image problems, avoid abrasive home remedies. Record where the damage is and whether function has changed, so the issue is clear during a repair assessment.
Cosmetic concealment is different from assessing damage. UV glue is a UV-curing resin that can fill cracks or tiny scratches and harden under ultraviolet light to create a smooth surface. Using it should not replace checking whether a mark is a shallow blemish or a deeper groove, or whether touch response and image quality have changed. A smoother surface doesn’t establish that the display is functioning normally. Consider appearance and screen behavior separately when deciding what to do next.
That experience is a reminder to weigh concealment against the display’s condition: a protector may make a mark less noticeable, but its appearance doesn’t show whether the glass underneath is damaged. If the screen has a deep groove or problems with touch or images, a cosmetic layer shouldn’t be treated as proof that the underlying issue is resolved. Base your next step on the mark’s location and effect, not just on whether it can be hidden.
Choosing cases with raised screen edges
Choose a case that creates a protective rim around the display without interfering with normal use. Check its fit on your device, then test how the screen sits against a flat surface.
- Inspect the case’s front lip before fitting it. A raised edge should extend beyond the screen plane, creating space between the glass and a flat tabletop when the phone rests face-down. A raised rim is one practical way of avoiding the frustration of a scratched screen. Check the side profile rather than judging from the front. The rim reduces direct surface contact, but doesn’t make the display immune to scratches.
- Match the case to the exact phone model. Camera placement, button positions, and screen shape vary between devices, even within a product family. A case designed for another model may sit unevenly or leave part of the display exposed. Check the model details in the device settings or packaging, then compare them with the case label.
- Test the fit at the screen corners. Press the case gently around each corner and along both sides; it should stay seated without lifting or shifting. A loose corner can reduce the rim’s protective clearance when the phone is placed face-down. Don’t force a case that bends the device or presses against the screen.
- Check compatibility with the screen protector already installed. A tight case may push a protector’s edges upward, while an oversized opening may leave more glass exposed. Fit the case slowly and watch the protector’s perimeter. If an edge curls, traps dust, or shifts, remove the case and reassess the combination before carrying the phone.
- Set the cased phone face-down on a clean, level surface to inspect its clearance. The case rim should meet the surface before the display does. To avoid the frustration of a scratched screen during ordinary placement, check this clearance on a desk or countertop, not a gritty outdoor surface. This fit check shows how the lip works, but doesn’t test impact protection.
- Inspect the case opening around the display, including curved edges and corners. A narrow bezel can leave curved glass more exposed than a flat screen. Check whether the rim follows the screen’s contour instead of stopping short near the sides. Clear openings matter, too: a lip shouldn’t block content or make edge gestures difficult.
- Keep the case and its contact points clean. Dust or grit caught between the case rim and phone can rub against the device as the case shifts. Remove the case periodically, wipe its inner edge and the phone’s perimeter with a soft cloth, then reseat it. Replace a case that has cracked or no longer holds its shape.
What causes scratches on phone and tablet screens?
- Keep screens away from sand and mineral grit. Fine particles can sit between a display and another surface, then scratch as the device moves. Beach sand, workshop dust, or soil on your hands can transfer during normal use. Before setting down a phone after outdoor activity, inspect its screen and gently clean away visible particles.
- Use a clean cloth, not one that has collected debris. A microfiber cloth can pick up grit from a desk, pocket, or camera bag; rubbing with it may drag particles across the glass. Check the cloth under good light before wiping. If it looks dusty or gritty, use a fresh, clean cloth instead.
- Lift the device instead of sliding it across a surface. A phone pushed over a desk may pick up abrasive particles beneath its screen or case. The same friction can occur when repositioning a tablet on a workbench. Pick it up, clear the surface, then place it where you want it.
- Separate tablets from accessories during storage. A keyboard cover, stylus, charging plug, or detachable accessory can press against the display when items shift inside a bag. Use the device’s designated compartment and keep loose accessories elsewhere. Before closing a tablet cover, check that no small object is between the screen and cover.
- Check the protector’s perimeter after a knock or repeated handling. A chipped or lifted edge can collect particles, which may rub against the display as the protector moves. Inspect the border in bright light and look for trapped debris. Carefully remove a damaged protector rather than pressing it back down over grit.
- Keep cleaning products and applicators free of particles. A spray bottle’s nozzle, reused wipe, or cloth stored beside dusty supplies can transfer debris onto glass. Apply cleaner to the cloth rather than directly to the device, and use a separate clean area of fabric for each pass. Keep liquids away from device openings.
- Review where the device rests during daily tasks. A phone placed beside craft materials may collect fine particles; a tablet used in a laboratory setting—such as while documenting experiments with materials from Peptide Store—can pick up fine residue from the workspace. Clear the immediate work area before use, and store the device away from loose materials afterward. Small routine changes reduce repeated contact with abrasive debris.
Does a scratched screen affect touch sensitivity or trade-in value?
- Test the touchscreen across the full display. Open a drawing app and trace slow lines through the scratched area, then repeat near each edge. Look for gaps, delayed responses, or taps that register somewhere else. A visible scratch can remain cosmetic, but missed input suggests the screen needs attention beyond surface appearance.
- Check the image for distortion before deciding the damage is cosmetic. Display a plain light background, then a dark one, and inspect the scratched area. Watch for discoloration, flickering, lines, or obscured content. A scratch that affects touch sensitivity or causes display distortion may require professional repair or screen replacement.
- Separate screen symptoms from app or setting problems. Restart the device, close the current app, and test touch response on another screen, such as the keyboard or settings menu. If the same strip fails across different screens, record its location and behavior. That clear observation helps describe the fault during a repair assessment.
- Document the screen condition before a trade-in assessment. Take clear photographs in even lighting, including one straight-on view and one angled view. Note whether the mark is on a removable protector or the device glass. Keep the distinction clear: a scratched protector and a scratched display are different visible conditions.
- Assess both appearance and function before estimating trade-in condition. A fine line that leaves text readable differs from a crack or mark that obscures content. Touch response matters, too. Record whether every part of the screen responds normally and whether the display shows distortion, so you can describe the device accurately.
- Review the specific trade-in terms before handing over the device. Read how the assessment describes screen condition, visible damage, and functional faults. A cosmetic mark may be judged differently from a damaged display, but the stated grading criteria determine the assessment. Keep the device details and condition notes together for a consistent handover.
- Choose your next step based on the result. If touch works throughout and the image remains clear, keep your notes and describe the mark honestly during assessment. If input fails or the display distorts, arrange professional repair or screen replacement before relying on the device. Don’t polish a damaged screen or conceal a fault before evaluation.
My IPG: IPG Phone camera lens protector
My IPG’s IPG Phone camera lens protector helps protect the camera lens from everyday contact. For display coverage, choose an IPG iPhone screen protector or IPG Samsung screen protector that matches your device. A screen protector and a raised-edge case serve different roles: one covers the display, while the case rim helps reduce direct contact with surfaces.
Choose these options when you want device-specific protection for the screen or camera area. For compatible iPhone and Samsung devices, IPG Camera Lens Protector for iPhone Samsung Tempered glass offers another lens-protection option. Match the protector to your device before selecting it, so the coverage suits the component you want to protect.
Contact My IPG to explore screen and camera lens protection for your device.
Make protection part of your device routine
Make protection a setup decision, not a repair reaction. When you bring a device home or change how you carry it, consider which surfaces face daily contact. A quick review at that point can help keep protection aligned with how you use the device.
Create a simple inventory of the phones and tablets you rely on. Note which ones travel in a bag, sit on a workbench, or get used outdoors. Those routines reveal where contact happens and where a small change in storage or handling could help. Revisit the list when your habits change, such as starting a new commute or carrying a tablet to work.
Consistency is the useful next step. A thoughtful routine for avoiding the frustration of a scratched screen helps you care for devices before marks become a distraction. Choose protection that fits the device and the way you use it, then keep that choice in mind as your routine evolves.
Ready to consider the right protection for your device? Explore your options with My IPG. A little attention now can help you feel more prepared every time you pick up your screen.
Frequently Asked Questions
How can I prevent scratches on a smartphone screen?
Use a fitted protector and give your phone a dedicated place in your bag or pocket. Avoid carrying it loose alongside coins, keys, or other hard objects. At a desk, place it on a clean stand rather than sliding it across the surface. Build these habits into your routine, especially when moving between work, travel, and outdoor activities.
Do screen protectors prevent scratches, and which type is best?
Yes, a screen protector adds a layer between the display and everyday contact, helping protect the screen’s surface. The right type depends on your priorities and device fit. Tempered glass provides a rigid cover, while film offers a thinner, flexible option. Choose one designed for your exact model, and replace it if damage affects visibility or use.
Are tempered glass screen protectors better than film protectors?
Neither material is universally better; the right choice depends on your device and preferences. Tempered glass has a rigid feel, while film is thinner and flexible. For a phone with curved display edges, check how each protector covers the usable screen area. Also consider how it fits with your case, since a tight fit can lift the protector’s edges.